How to install Wordpress in Direct Admin?
WordPress is the web’s most popular content management system (CMS) and powers over 35% of all the web’s sites. This tutorial will go through numerous ways of getting WordPress installed within the Direct Admin control panel.
Login to Direct Admin
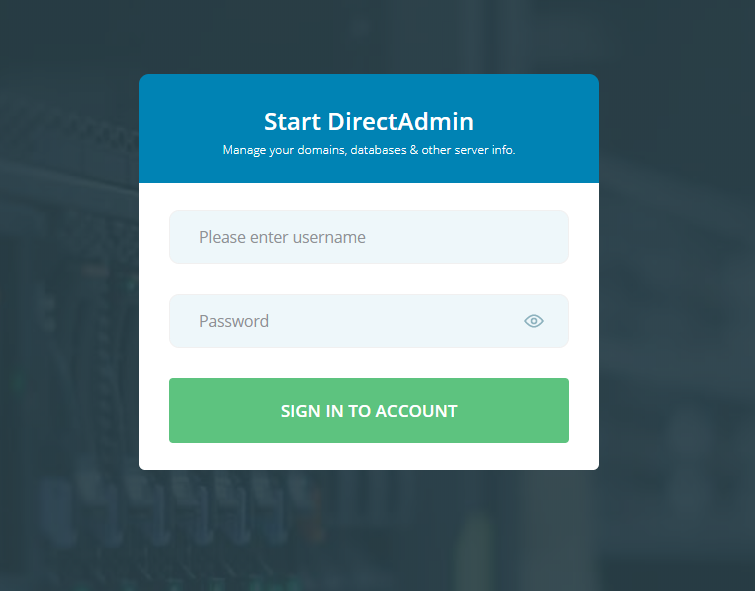
Before beginning with any methods to install WordPress, you must log in to Direct Admin. Direct Admin’s login URL is almost always located at domain.com:2222. If not, your web hosting provider should provide you with an alternate login.
Here is an example of the login page located at one of our servers, Hosteza Hosting controls:
Method #1: Installing WordPress with Softaculous
Softaculous is a premium built-in Plugin for Direct Admin. Hosteza supports Softaculous on all our servers, and we recommend using it to install website-related applications as it offers built-in functionality to install applications like WordPress with just a couple of clicks.
Step 1: Locate the Softaculous Application
Within Direct Admin, under the “Extra Features” Section, you should notice the Softaculous Auto Installer; click on it to proceed.

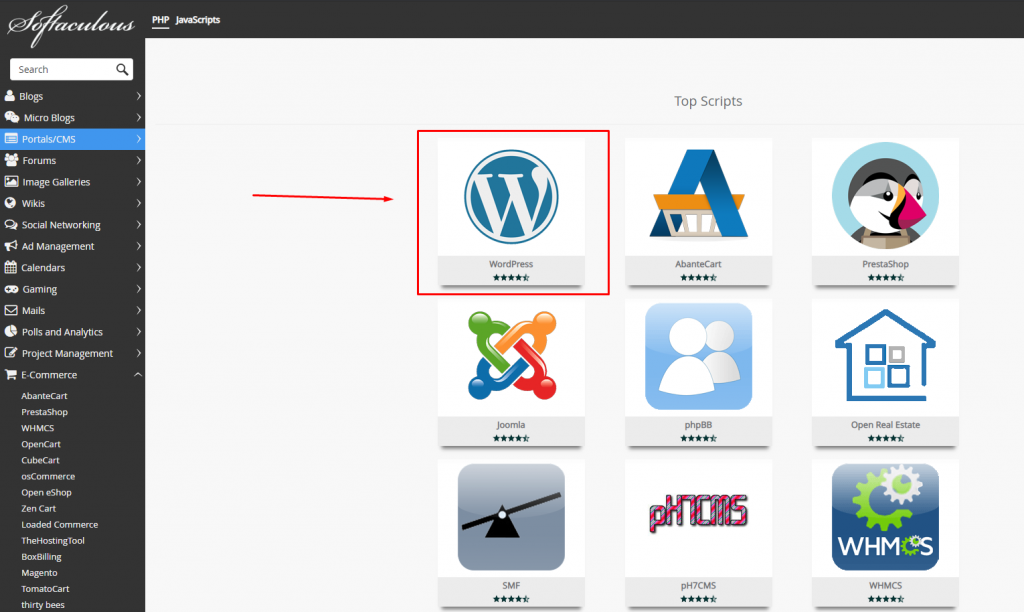
Step 2: Finding the WordPress Application within Softaculous
Once within the Softaculous Auto Installer page, you should notice a bunch of applications that you can install, try to locate, or search for WordPress. However, Softaculous should show WordPress on the Homepage as it is the most installed application:
Once you have found the WordPress installer, click on it, and an installation page should pop up, click on either the “Install” or “Install Now” buttons as illustrated below:

Step 3: Configuring WordPress Settings
You can now configure the installation settings:
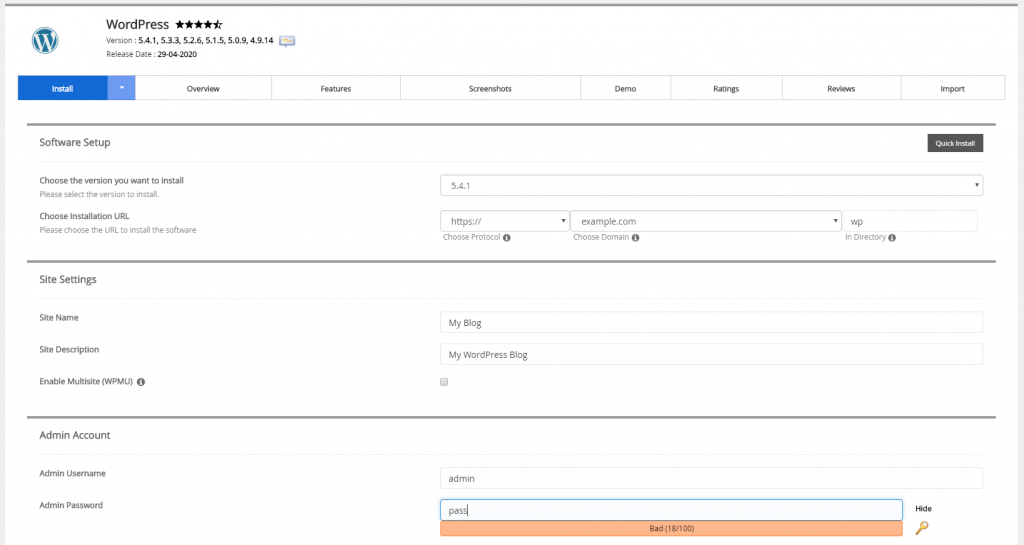
Configuration Settings:
- Choose the version you want to install: The WordPress version of your installation; we recommend keeping this default as it will install the latest version.
- Choose Installation URL: The installation folder of WordPress; if you prefer to have your WordPress installed on your root domain (example.com), you will have to leave the “In Directory” setting blank. If you prefer your WordPress to be installed in a folder, include that folder’s name. For example, if you want to install your WordPress on example.com/blog, you will fill in “blog” within this field.
- Site Name: WordPress Site Title; this can permanently be changed at a later date if needed within WordPress’s dashboard.
- Site Description: Description of your Website; this setting can also be easily changed later within WordPress’s dashboard.
- Admin Username: The Admin username that you will use to login to WordPress’s Admin dashboard (Located at domain.com/wp-admin/login.php)
- Admin Password: Password you will use alongside your Admin Username to log in to WordPress’s Admin dashboard)
- Admin Email: The email WordPress will use to send you notifications regarding your website, such as plugin notifications, updates, etc
- Select Language: The language your WordPress installation will default to.
- Limit Login Attempts (Loginizer): A Standard security plugin Softaculous includes by default within the installation configuration. We strongly recommend keeping it enabled, as it will limit the number of login attempts made to your admin dashboard.
- Classic Editor: The old WordPress editor is only required if you are used to the old WP editor layout.
- Advanced Options: We recommend not changing these options as they should already be pre-filled. Only make changes if you know Database management.
- Select Theme: Choose a theme your installation will use; you can also easily change this later in WordPress’s dashboard.
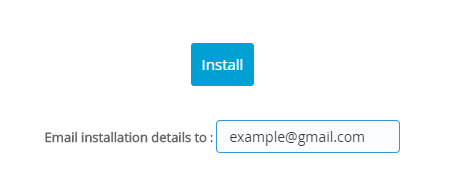
Once you have configured your WordPress installation, click the “Install” button. You can also fill in your email address to have the installation details sent to you directly.
Softaculous will not begin installing WordPress according to your configuration; once complete, you will get a notification on the installation page and an email confirming the installation (If you filled out your email in the last step).
Method #2: Installing WordPress Manually
Another way of installing WordPress is by installing it manually, and it's a bit more technical than Method #1. We recommend using this method only if you do not have access to a quick installer like Softaculous.
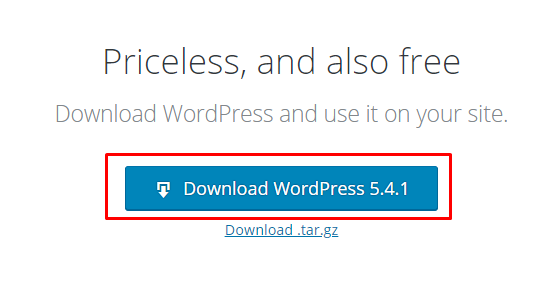
Step 1: Download WordPress
To start with the installation, you must go to WordPress’s download site and click the “Download WordPress” button, as illustrated below.
Once the .zip folder is downloaded to your computer, move on to the next step.
Step 2: Unzip the files
Unzip the WordPress files (located under “Latest.zip”), which should create an unzipped folder with all the WordPress Files & Folders.
Step 3: Upload the WordPress Installation files to Direct Admin
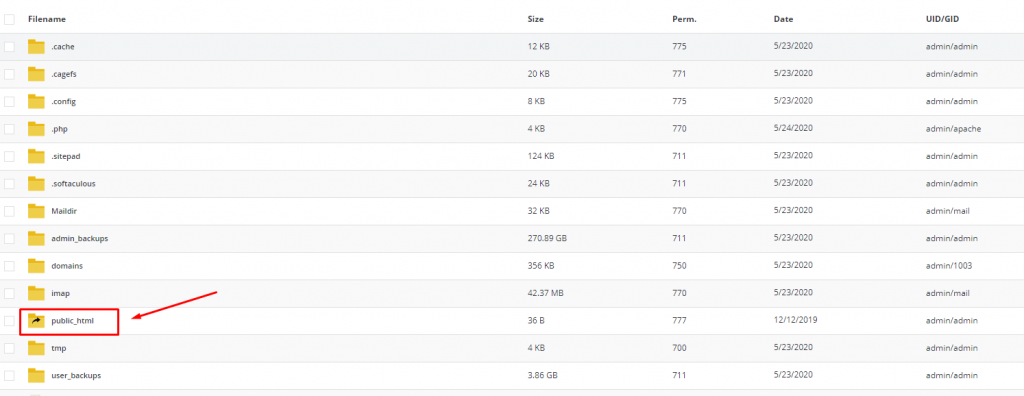
Login to Direct Admin and locate the “File Manager” application under the “System Info & Files” section.

Click on it, and you should be presented with Direct Admin’s built-in File Manager. By default, it should show you the root directory of your hosting account. Click on the “public_html” folder.
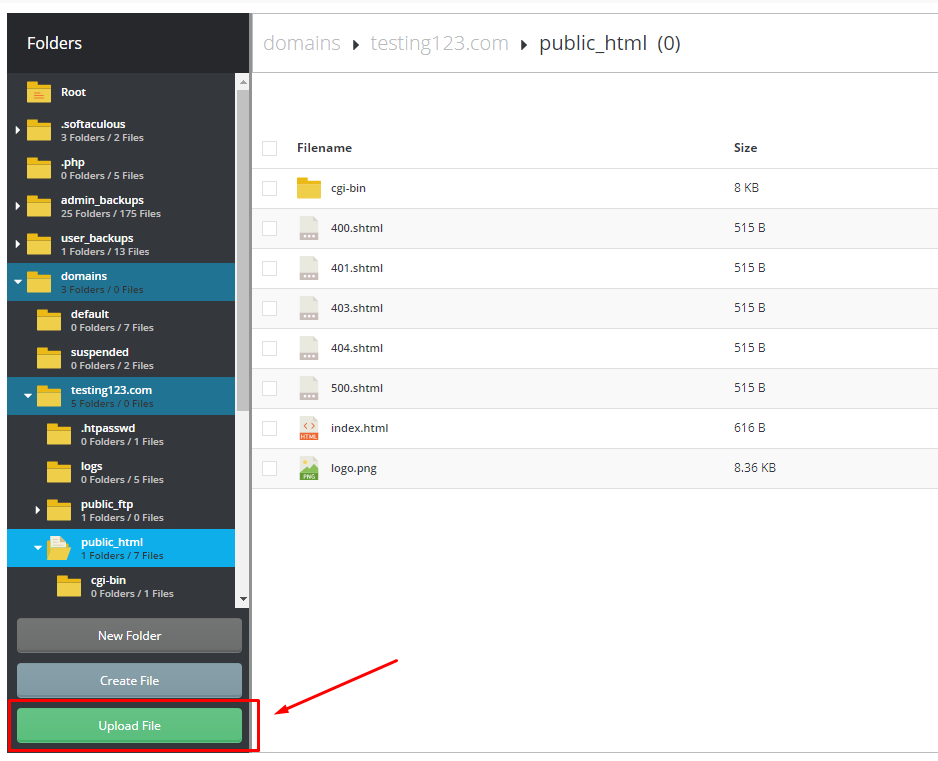
If you would like WordPress to be located in the domain's root directory, such as example.com, upload the unzipped WordPress directory with the “Upload” button at the bottom-left of the page.
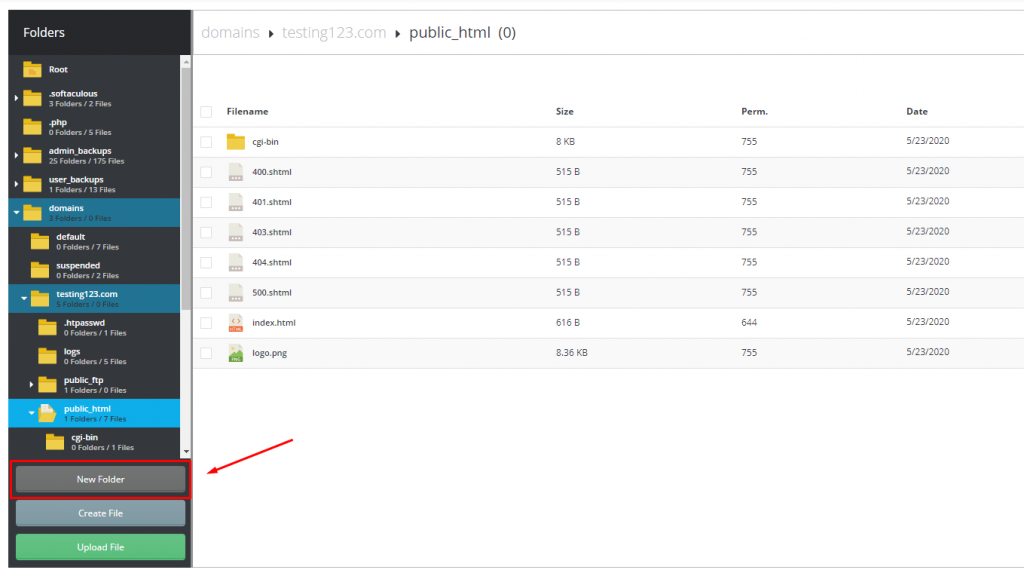
If you would like WordPress to be located within a directory such as example.com/wordpress, create a folder with the “New Folder” button, rename it to the directory name of your liking and upload the unzipped WordPress directory into that folder.
Step 4: Run the installation page
Once WordPress has been uploaded to your hosting account, visit the URL of the installation depending on where it has been installed, for example:
- If installed on the root directory, visit http://example.com
- If installed within a folder, visit http://example.com/folder-name
You should then see a couple of installation settings, fill them in and click install. WordPress will now begin the installation on your hosting account. This usually takes about a minute.
That's it! Happy blogging!


